In my defense, usually I know that's how it will go so I just won't even start. ...I think that's a defense, right?
This all began once upon a time when I was a youngin' watching an episode of "Zoom" on PBS. (The 1999+ version, not the 1970's version.) Anyone remember that show? In this episode, they showed a painstakingly slow way to make homemade Reese's, vaguely reminiscent of the one I do now. Theirs involved freezing about 4 or 5 layers of chocolate individually, however, and I do not have the patience for that. Not when I know Reese's will come out of this. I also do not at all remember how they did the filling, but several years after I first watched that episode I came up with my own based on what I remembered.
Now, the best part of this recipe: It's three ingredients. That is not a trick to make you more likely to try it. Really, it is only three. However, unlike most recipes where I encourage you to make it your own and substitute as you like, I can only guarantee the same level of deliciousness if all of the ingredients are done the same way. With only three ingredients, any substitutions could radically change the flavor. Not that you can't substitute--just adjust the other ingredients accordingly. i.e. If you use regular peanut butter, add a little more sugar. The low-fat peanut butter has added sugar, hence it still tasting great while being lower fat. Also hence it being my favorite kind of peanut butter. Mmm. <3
Let's get to it:
Prep Time: 20-25 minutes
Cook Time: 3 minutes
Freeze Time: 40 minutes
Yields: 8 larger Reese's, 20-25 smaller Reese's
Ingredients:
1-3/4 cup semi-sweet milk chocolate chips/chunks
1 cup low-fat creamy peanut butter (Jif is the best!)
5 tablespoons - 1/3 cup confectioner's sugar
The end.
Just kidding, here's the fun part:
Directions:
1. Start with your chocolate chips, about one cup of your total. I accidentally bought chunks so these ones are half chips, half chunks.
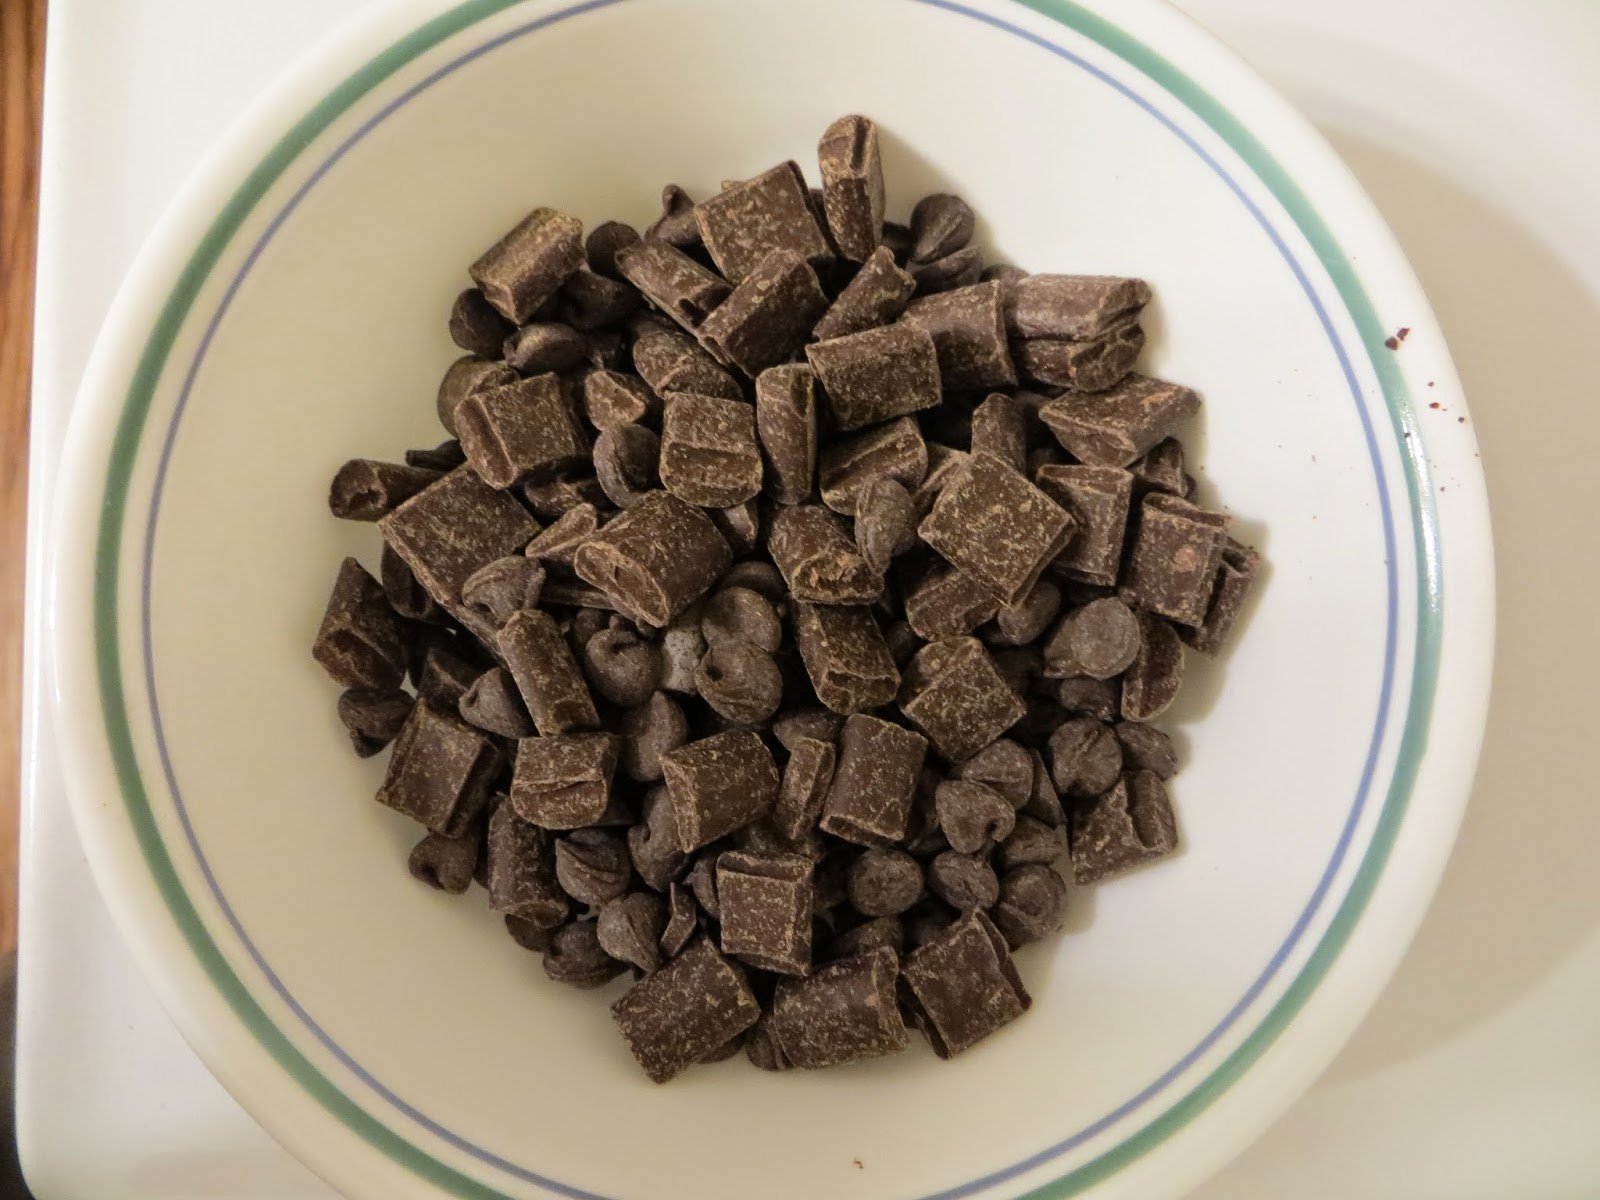
Melt them in the microwave. I found that 1 minute on 70% power, stirred, and then another 30 seconds does the trick for the right consistency, but every microwave is different. Just make sure to stir it partway through so the chocolate doesn't burn.

Now if you are the kind of fancy person that has a double-boiler to melt chocolate, by all means use the double-boiler. I am not that fancy. It's on my culinary wish list, but the microwave does the trick just fine.
Next, plop a good spoonful into doubled-up cupcake wrappers, since they'll hold together easier. I usually go for the little paper ones, but my store only had either a) Big paper ones or b) little tin ones. You can use the tin ones if you like, but I always find that they're a little tougher to peel away from the peanut butter cups. I personally recommend going with the little paper cups if you can find them and making smaller Reeses's.

Use a spoon to spread the chocolate up the sides of the cupcake wrapper, as evenly as possible. Variation is okay as long as you don't have any spots that are transparent--they will be much more likely to break off while peeling if you can see the wrapper through the chocolate.
Repeat this step until all of your chocolate is gone. Pop them in the freezer! This batch only took about 20 minutes to harden. Pull them out once they're completely solid.
Next, smack your peanut butter into a bowl. Or place it there if you're nicer than me.

Add the confectioner's sugar.

Mix thoroughly, but carefully...this step can be exceedingly messy if you're too rough with that sugar. If there is a little bit of white frost left over, that's okay!

Plop a spoonful of that into one of the chocolate cups.

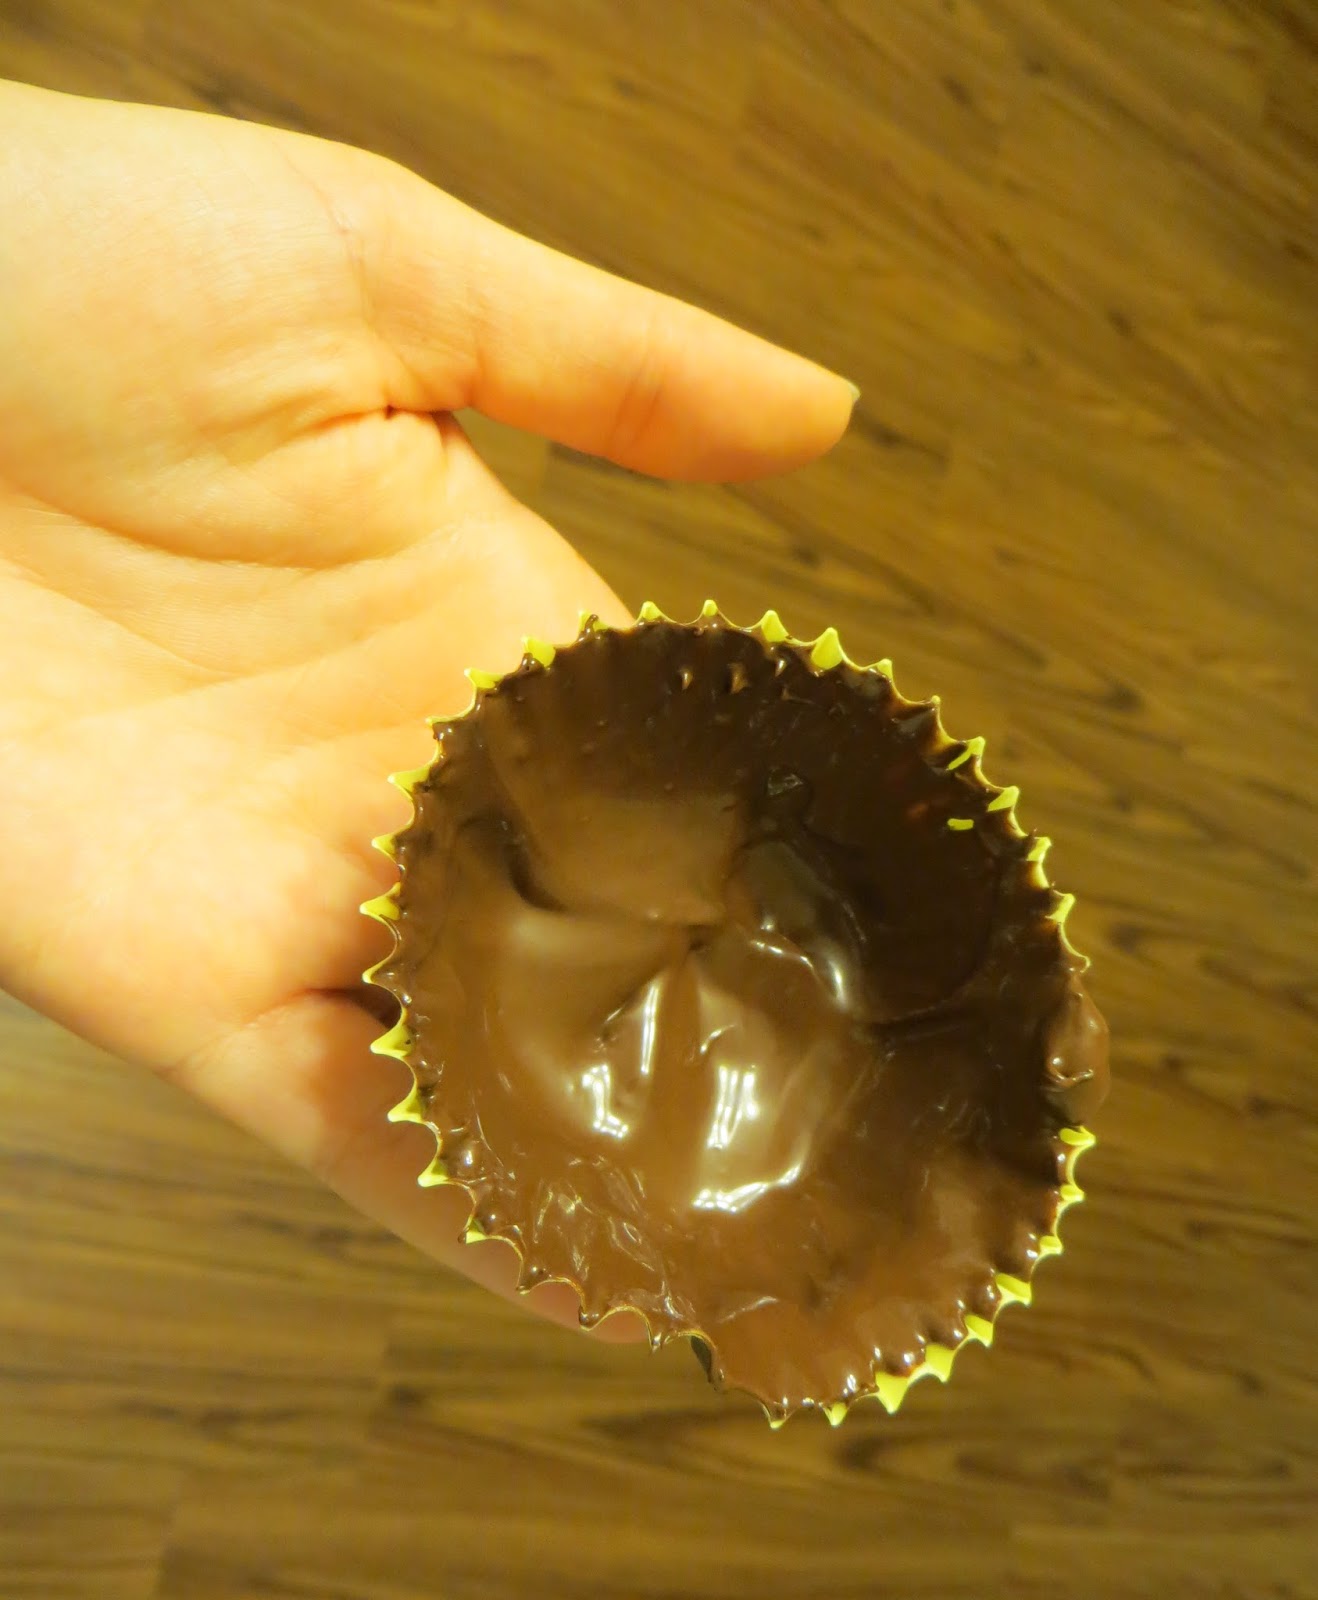
Spread that around gently so as not to break the chocolate shell. If you hold it from the bottom, it usually less likely to chip. Excuse my chocolate-covered fingers.

Sprinkle a little extra confectioner's sugar onto the tops of all the peanut butter layers.

Now, you can let these freeze too if you want to be really thorough, but I just go right into the next step.
Get more chocolate (3/4 cup). Melt that, too (1 min on 70% + 20 seconds). Spoon a glop on top of your peanut butter.

Spread it around so that it completely covers the peanut butter and meets the sides of the shell.

And throw them back in the freezer! Or place them, if you're a pacifist. (On a side note, what the heck is up with perfectly groomed freezers on cooking shows? I had to throw things aside to make it look nice-ish for this photo.)

Wait until the tops harden also and pull them out. Tada! A little homely in shape, perhaps, but totally delicious. (See that transparent spot I said not to have? That one broke off when I peeled it.)

Pinch a little bit of the wrapper and pull away. It will probably rip. I repeat, it will rip. Don't panic. Maybe that's a note for me, not you, since I always want them to just pop out perfectly without any issues.

And then you have a homemade Reese's! I'd give you verbatim comments from hubby, but his reaction was mostly just primal groans of delight and ecstasy. They don't translate well into written words. Kind of an Auohhohohumnngh. Suffice it to say, he enjoyed them.
Here's a cross-section. How cute!

Enjoy! Or if you're like us, enjoy a little too much. This is all that was left the next morning. We may have a problem with these.

loved this one! you are so good at writing and putting up pictures!
ReplyDeleteThank you! :)
Delete